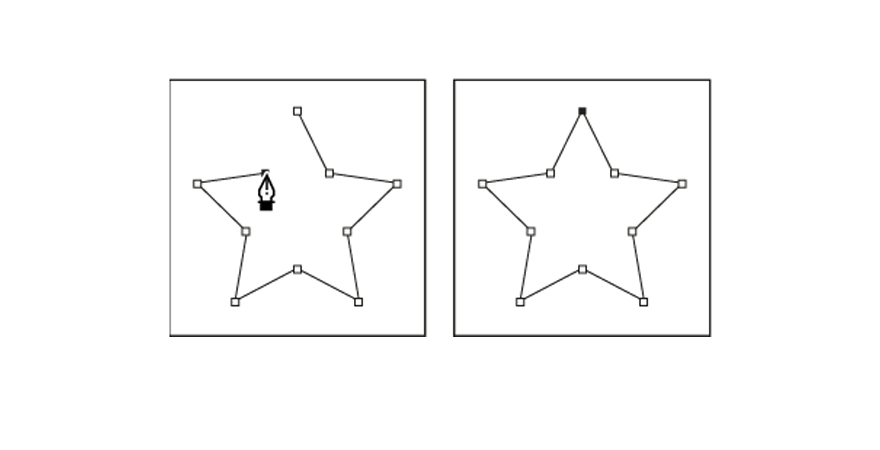
The Pen tool lets you draw your own shapes. It has four different options:
- Standard Pen to draw curves and straight segments
- Curvature Pen to draw straight segments and curves intuitively
- Freeform Pen to draw freely, like you’re using pen and paper
- Magnetic Pen to draw paths that snap to the edges of certain defined edges, for more precision
We’ll go over how to use the standard Pen tool for now. For more advanced tips, look up Adobe Photoshop tutorials on the pen tools.
Select the standard Pen tool by clicking and holding the pen icon and choosing the one that says “Pen Tool.” You can also go through the different Pen tools by clicking the main icon on the toolbox menu, and then typing “shift + P” as a keyboard shortcut.
Every time you click your document, you’ll create an anchor point. Anchor points act as a corner, or a point where your shape curves.

For example, you can draw a star by clicking all the places where you want the star’s corners to be. To close the star, click the first anchor point you drew.
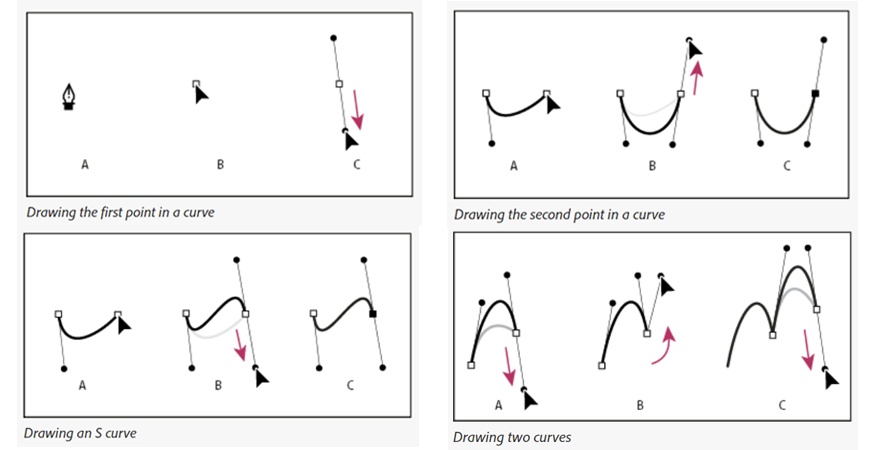
To draw a shape with curves:
- Click where you want the first anchor to go. But don’t release – instead, drag the mouse so that you create direction lines that will shape the curve. The shape of your curve will depend on the length and slope of your direction lines. Release the mouse click when you’ve drawn your direction line.
- Click where you want your curve segment to end, which is where the curve will change its angle or direction. Say you want to make a C-shaped curve. To do this: click to create your second anchor point, then drag the mouse in the opposite direction you dragged to create the first direction line in step 1. If you want to make an S-shaped curve instead of C-shaped, drag the mouse in the same direction as your first direction line.

- Repeat this process until you have the right shape. Note: you can move any of your anchor points or change the location of any of your direction lines at their endpoints. To do this, hold the “Control” key down before you click any of these points, and keep holding it until you’re done. If you accidentally create an extra point by forgetting to type the Control key, you can type “Control + Z” to undo to the last step (or you can click Edit → Undo in the top menu). Control + Z works for anything you do in Photoshop, so remember this handy shortcut.